Cart
0
You may also like


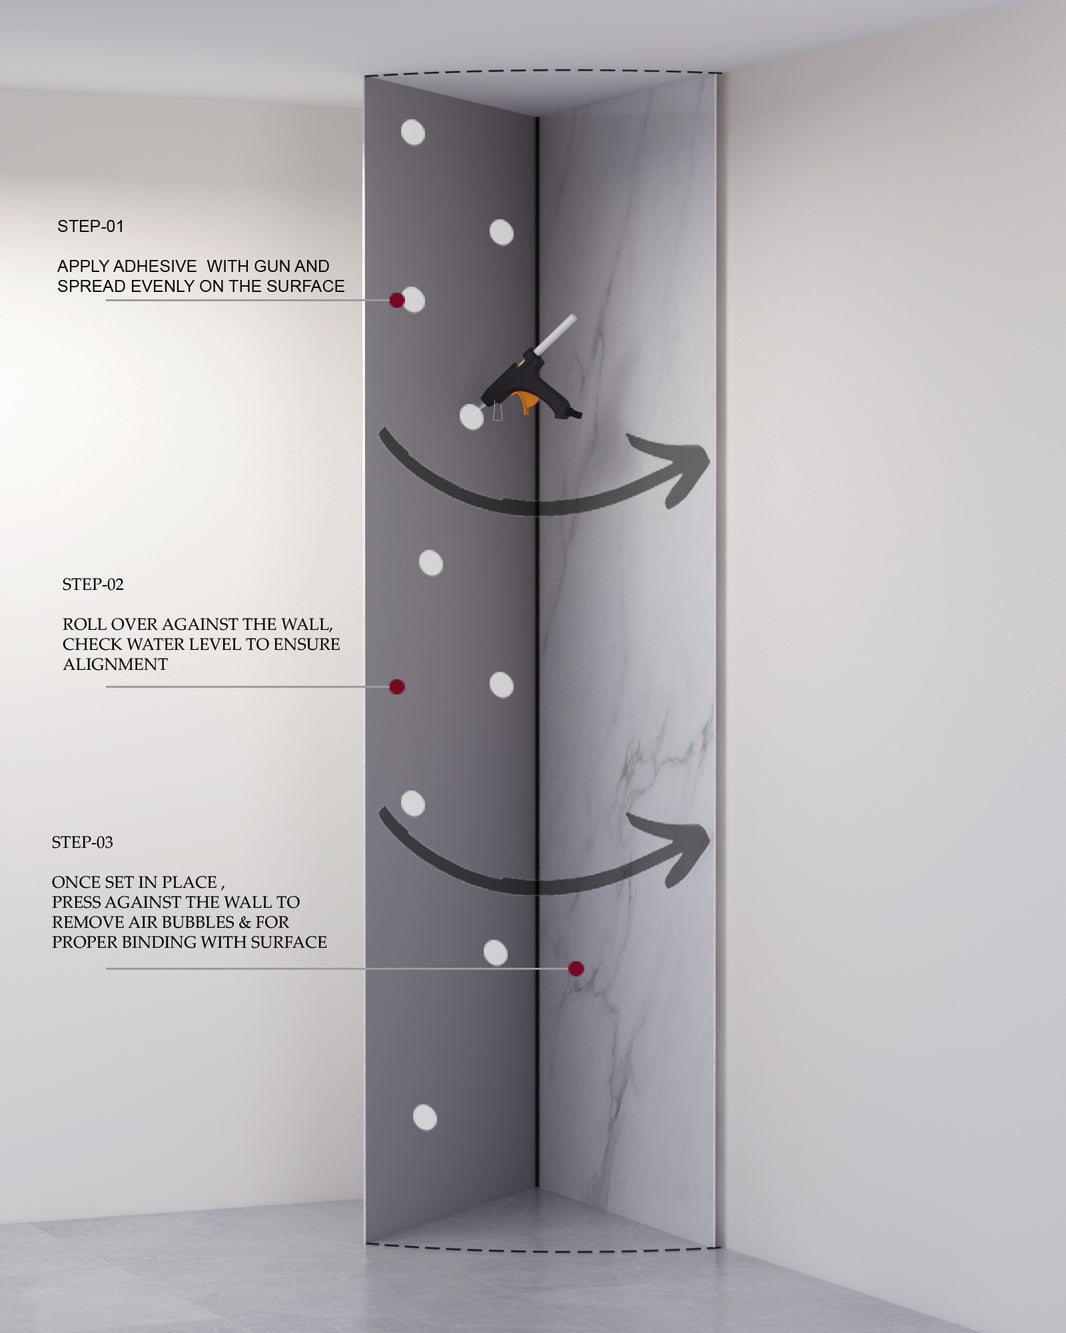
| Installation | Easy! Possible to DIY | Tricky and requires an expert |
|---|---|---|
| Cost | Approximately $170 a panel | Approximately $20/sqft (including installation) |
| Design | Perfectly mimics the appearance of marble, cement or tile | We'll admit that tile can look great if installed correctly |
| Warranty | 10 Year Warranty | None |
| Maintenance | Almost none required, just wipe down with a cloth | Grout needs cleaning and allows mould to grow |

Hello! How can I help you today?